Kubernetes – Network policies

To access the pods indirectly you can use Network policies, which work like firewalls.

You can block or allow egress or ingress traffic to Pods.

The association with pods is made by using labels. They exposes HTTP and HTTPS routes,

EGRESS

If you want to restrict, for example, the outgoing TCP connections from a deployment, except a specific port (like UDP/TCP port 53 for DNS resolution), then you need to define an egress.

In the following example we also have another egress rule, that allow outgoing connection to pod having the “api” label on port 80 and 443:

apiVersion: networking.k8s.io/v1
kind: NetworkPolicy
metadata:
  name: np1
  namespace: venus
spec:
  podSelector:
    matchLabels:
      id: frontend          # label of the pods this policy should be applied on
  policyTypes:
  - Egress                  # we only want to control egress
  egress:
  - to:                     # 1st egress rule
    - podSelector:            # allow egress only to pods with api label
        matchLabels:
          id: api
     ports:
         ports:
        - port: 443
        - port: 80
        
  - ports:                  # 2nd egress rule
    - port: 53                # allow DNS UDP
      protocol: UDP
    - port: 53                # allow DNS TCP
      protocol: TCP

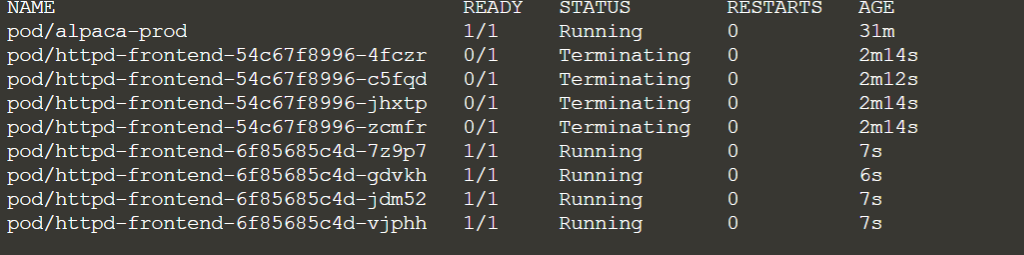
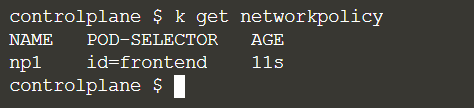
After creating the network policy, you can see that the pod selector is “frontend”

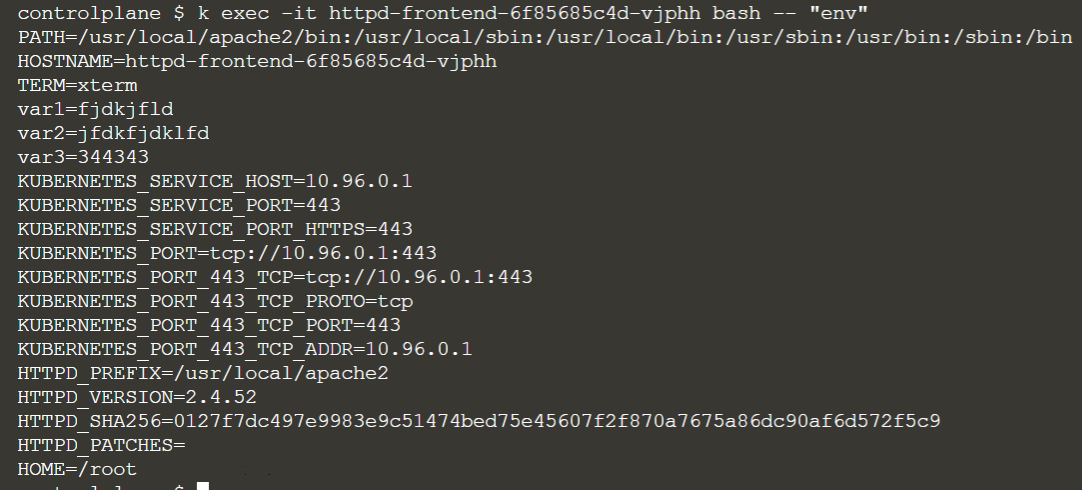
In the frontend pod you can call any website:

INGRESS

An ingress is like a virutal host and permits multiplex access to several microservices with a single load balancer. It can do load balancing itself and only works with Nodeport.

There are several ingress controllers, like nginx, Kong or Contour. You need to have one of them installed.

Let´s say we want to block traffic from FTP server, from A CIDR IP block on a certain port and from a namespace having as label “team=A”:

apiVersion: networking.k8s.io/v1
kind: NetworkPolicy
metadata:
  name: untitled-policy
spec:
  podSelector: {}
  policyTypes:
    - Ingress
    - Egress
  ingress:
    - from:
        - podSelector:
            matchLabels:
              app: ftp
      ports:
        - port: 21
    - from:
        - namespaceSelector:
            matchLabels:
              team: A
    - from:
        - ipBlock:
            cidr: 10.2.1.3/32
      ports:
        - port: 443
  egress:
    - to:
        - podSelector:
            matchLabels:
              app: frontend
      ports:
        - port: 443
        - port: 80

As you can see with can put several Ingress and Egress rules in the same NetworkPolicy manifest, as you have “policyTypes” in the spec.

You can create Ingresses with imperative commands too, like:

$ kubectl create ingress my-webapp-ingress --rule="foo.bar/foo=service1:8080"

The following Ingress rules are possible:

  • optional host (otherwise all HTTP traffic)
  • list of paths (exposed as POSIX regular expressions)
  • backend (serviceName and servicePort)

You can often find a default single backend for incoming traffic that is not related to a specific path, but you can refine your backend configuration with backend types:

  • simple fanout (for multiple backends, to minimize the number of load balancers)
  • name based virtual hosting (to match to a specific service)
  • TLS ingress (to use a TLS secret)

Kubernetes – Storage options – ConfigMap and Secrets

As the pods might need the same configuration variables or credentials, you can store them in a single location by using a ConfigMap or a SecretMap.

This mechanism is called “configuration injection”.

You can create a config map the imperative way and specify the source, that can be:

  • from literal
  • from file
  • from env-file

For example:

$ kubectl create configmap cm-db --from-literal=DB_NAME=mydb --from-literal=DBHOST=mydbsite.net

You can generate if from a file, like:

$ kubectl create configmap game-config --from-file=/opt/config-maps/my-map.txt

The file “my-map.txt” might look like:

# Environment files use a new line for each variable.
KIAMOL_CHAPTER=ch04
KIAMOL_SECTION=ch04-4.1
KIAMOL_EXERCISE=try it now

You can as well define a map directly in a yaml file, in the declarative way. For example, to use the file “nginx.conf”:

apiVersion: v1
kind: ConfigMap
metadata:
  name: config
data:
  nginx.conf: |
    server {
      location / {
        root /data/www;
      }
      location /images/ {
        root /data;
      }
    }

Or simply key-value entries like:

apiVersion: v1
kind: ConfigMap
metadata:
  name: random-generator-config
data:
  PATTERN: "logging"
  EXTRA_OPTIONS: "high-secure,native"
  SEED: "432576345"


You can use the alias “cm” as well. For example, to get the details:

$ kubectl get cm my-cf-map
 

The config map needs to exist before you deploy the pod.

You can add an environment variable from a config map for a specific container, like:

apiVersion: v1
kind: Pod
metadata:
  name: random-generator
spec:
  containers:
  - image: k8spatterns/random-generator:1.0
    name: random-generator
    env:
    - name: PATTERN
      valueFrom:
        configMapKeyRef:                   
          name: random-generator-config
          key: pattern

Or even add all the variables by a prefix for all the containers with “envFrom”:

apiVersion: v1
kind: Pod
metadata:
  name: random-generator
spec:
  containers:
    envFrom:                              
    - configMapRef:
        name: random-generator-config
      prefix: CONFIG_

You can also mount a config map as a volume:

apiVersion: v1
kind: Pod
metadata:
  name: random-generator
spec:
  containers:
  - image: k8spatterns/random-generator:1.0
    name: random-generator
    volumeMounts:
    - name: config-volume
      mountPath: /config
  volumes:
  - name: config-volume
    configMap:                            
      name: random-generator-config

This ways the volume will map each entry with a file.

SECRETS
Secrets have a similar API to config maps, but they are managed by Kubernetes in a different way: they are stored in memory rather than disk and encrypted both when in transit and at rest.

There are three types of secret:

  • docker-registry
  • TLS
  • generic

Assuming you want to put your username and password in two different text files, called “username.txt” and “password.txt” respectively, you can create a secret like the folliwng:

$ kubectl create secret generic database-creds --from-file=username.txt --from-file=password.txt

$ kubectl create secret generic passwords --from-literal=password=foobar

Notice that you need to include “generic” in the command.

You create tls and docker-registry entries in the same way:

$ kubectl create secret tls demo-tls --key "auth.key" --cert "auth.cer" -n foo

$ kubectl create secret docker-registry gcr-pull-key --docker-server=gcr.io --docker-username=_json_key --docker-password="$(cat gke_key.json)" --docker-email=xyz@slb.com

In the manifest file, you can reference secrets:


apiVersion: v1
kind: Pod
metadata:
  name: random-generator
spec:
  containers:
  - image: k8spatterns/random-generator:1.0
    name: random-generator
    env:
    - name: LOG_FILE
      value: /tmp/random.log                   
    - name: PATTERN
      valueFrom:
        configMapKeyRef:                       
          name: random-generator-config        
          key: pattern                         
    - name: SEED
      valueFrom:
        secretKeyRef:                          
          name: random-generator-secret
          key: seed

Just like for the config mpa, you can import all the keys an env variables at once, like:

  containers:
  - name: secret-handler
...
    envFrom:
    - secretRef:     
        name: secret1

Besides using the “secretKeyRef” parameter, you can reference a file in a volume and then specify the secret name in the “volumes” section.

For example,:

spec:
  containers:
    - name: db
      image: postgres:11.6-alpine
      env:
      - name: POSTGRES_PASSWORD_FILE       # Sets the path to the file
        value: /secrets/postgres_password
      volumeMounts:                        # Mounts a Secret volume
        - name: secret                     # Names the volume
          mountPath: "/secrets"            
  volumes:
    - name: secret
      secret:                             # Volume loaded from a Secret 
        secretName: todo-db-secret-test   # Secret name
        defaultMode: 0400                 # Permissions to set for files
        items:                            # Optionally names the data items 
        - key: POSTGRES_PASSWORD  
          path: postgres_password


Credentials get encoded in base64. So you can basically read them in clear text, by running:

$ echo <secret-string> | base64 -d

This means that it´s better to use a specific tools if you want to achieve more security!

As secrets can be accessed by whoever has access to the cluster and decoded (i.e. read in clear text!), they cannot be considered a good productive solution. In other words, you should better look around for a specific commercial tool like Hashicorp Vault. 

Kubernetes – Storage options – Volumes and claims

In Kubernetes, Pods use an ephemeral local storage strategy as default. But if you need to make your date outlive the pod or share it across workloads, you can define a volume in the pod specification, that can be shared among containers.

If you need to retain the data in case the pods are killed, you need a persistent volume, that refers to an external storage.

Several types of volumes are supported by Kubernetes:

  • emptyDir
  • hostPath
  • azureDisk (for Microsoft Azure)
  • awsElastickBlockstore (for Amazon Web Services)
  • gcePersistenceDisk (for Google cloud)
  • etc.

Emptydir

The type “emptyDir” can be used in a pod specification to create and empty directory and mount it to one or more containers. This gives you the opportunity to vastly create an ephemeral file system to use in your pod.

You can specify a volume in the spec sectuin as “volumes” and the add a “volumeMount” in each container section:

spec:
   containers:
  - image: g1g1/hue-global-listener:1.0
    name: hue-global-listener
    volumeMounts:
    - mountPath: /notifications
      name: shared-volume
  - image: g1g1/hue-job-scheduler:1,0
    name: hue-job-scheduler
    volumeMounts:
    - mountPath: /incoming
      name: shared-volume
  volumes:
  - name: shared-volume
    emptyDir: 
       medium: Memory

HostPath

Sometimes, you want your pods to get access to some host information (for example, the Docker daemon) or you want pods on the same node to communicate with each other. That´s why you might need HostPath volumes.

HostPath volumes persist on the original node and are intended or intra-node communication.

If a pod is restarted on a different node, it can’t access the HostPath volume from its previous node.

The containers that access host directories must have a security context with privileged set to true or, on the host side, you need to change the permissions to allow writing.

An example of of HostPath volume used by a container.

apiVersion: v1
kind: Pod
metadata:
  name: hue-coupon-hunter
spec:
  containers:
  - image: busybox    
    name: hue-coupon-hunter
    volumeMounts:
    - mountPath: /coupons
      name: coupons-volume
    securityContext:
      privileged: true
  volumes:
  - name: coupons-volume
    host-path:
        path: /etc/hue/data/coupons

The “securityContext” section is mandatatory to make it work!

Local volumes

Local volumes are similar to HostPath, but they persist across pod restarts and node restarts.

The purpose of local volumes is to support StatefulSets where specific pods need to be scheduled on nodes that contain specific storage volumes.

We need to define a storage class for using local volumes. For example:

apiVersion: storage.k8s.io/v1
kind: StorageClass
metadata:
  name: local-storage
provisioner: kubernetes.io/no-provisioner
volumeBindingMode: WaitForFirstConsumer
$ kubectl create -f local-storage-class.yaml
storageclass.storage.k8s.io/local-storage created

Now, we can create a persistent volume using the storage class that will persist even after the pod that’s using it is terminated:

apiVersion: v1
kind: PersistentVolume
metadata:
  name: local-pv
  labels:
    release: stable
    capacity: 1Gi
spec:
  capacity:
    storage: 1Gi
  volumeMode: Filesystem
  persistentVolumeReclaimPolicy: Delete
  storageClassName: local-storage
  local:
    path: /mnt/disks/disk-1
  nodeAffinity:
    required:
      nodeSelectorTerms:
      - matchExpressions:
        - key: kubernetes.io/hostname
          operator: In
          values:
          - minikube

As we are defining it as a local volume, we can´t omit the nodeAffinity.

To assign a volume to a Container, you need to define a persistence volume claim, that claims the same storage size.

Persistence volume claims represent a request of storage, by specifying the size and the type of volume you need.

For example:

kind: PersistentVolumeClaim
apiVersion: v1
metadata:
  name: local-pvc
spec:
  storageClassName: local-storage
  volumeName: local-pv
  accessModes:
   - ReadWriteOnce
  resources:
    requests:
      storage: 1Gi

Once the PVC is bound to a volume, the volume is available to the pods.

Run “kubectl get pv,pvc” and make sure that the pvc is bound:

Kubernetes looks for a pv that matches the volume claim requirements.

Once you have a persistence volume claim, you can add the dependency of the persistence volume in your Pod:

apiVersion: v1
kind: Pod
metadata:
  name: random-generator
spec:
  containers:
  - image: k8spatterns/random-generator:1.0
    name: random-generator
    volumeMounts:
    - mountPath: "/logs"
      name: log-volume
  volumes:
  - name: log-volume
    persistentVolumeClaim:                 
      claimName: local-pvc

If storageClassName is not specified in the PVC, the default storage class will be used for provisioning.

For more infos check:

https://kubernetes.io/blog/2017/03/dynamic-provisioning-and-storage-classes-kubernetes/

Kubernetes – Using Helm

The helm repo command helps you manage the repositories you have access to. After installation, you can see that you do not have access to any repository:

$ helm repo list

Error: no repositories to show

You can add a new repository with the command helm repo add, for example:

$ helm repo add bitnami https://charts.bitnami.com/bitnami

"bitnami" has been added to your repositories

If you check the list again, you can see the repo:

$ helm repo list

NAME     URL

Bitnami  https://charts.bitnami.com/bitnami

Now, you can install a chart from this repository:

$ helm install my-wp-install bitnami/wordpress[...]

Later, when a new version is released, you can upgrade your installation with the helm upgrade command 

$ helm upgrade my-wp-install bitnami/wordpress

Release "my-wp-install" has been upgraded.

Happy Helming![...]

You can manage the history of the deployed revisions with helm history

$ helm history my-wp-install

If necessary, you can roll back to a previous release:

$ helm rollback my-wp-install

You can uninstall the package with the helm uninstall command:

$ helm uninstall my-wp-install

GETTING READY FOR THE CKAD EXAM

If you take the CKAD exam, you might be asked to update an existing repo. It means that, before upgrading your installation, you should run:

$ helm repo update

Helm can be used as alternative to kubectl create. You can specify options for your deployments, like the replicaCount:

$ Helm -n mercury install internal-issue-report-apache bitnami/apache –-set replicaCount=2 –-set image.debug=true

Kubernetes – Health checks with liveness and readiness probes

Container probes allows you to test the health of your pods through a generic mechanism, that you can configure and execute according to your needs.

There are three types of probes:

  • exec – a command executing, expected to return 0 as exit value 
  • httpGet – a request expected to return 200
  • tcpSocket – for successful connectivity

And two categories:

  • liveness probe  – to check the health of the running application
  • readiness probe – to check if the application is ready to start working

Liveness probe

If you define a liveness probe, you basically will add a command to check if the pod is working as expected. If not, a restartPolicy can be defined.

The three types of  liveness probes are:

  • ExecAction: a command within the Pod to get a response. A result of anything other than 0 represents a failure.
  • TCPSocketAction: it consists of trying to open a socket, without doing anything else. If the socket opens, the probe is successful, and if it fails (after a timeout), the probe fails.
  • HTTPGetAction: Similar to the socket option, this makes an HTTP connection to your Pod as a URI specified, and the response code of the HTTP request is what is used to determine the success/failure of the liveness probe.

The restart Policy can have the following values

  • Always (default)
  • OnFailure
  • Never

The restartPolicy can be found under spec.template.spec:

apiVersion: batch/v1
kind: Deployment
metadata:
 name: my-dep
spec: template: metadata: name: my-dep-template
  spec: containers: - name: my-container
      image: busybox command: ["echo", "this is my container!"] restartPolicy: OnFailure

Kubernetes keeps track about how often a restart occurs and will slow down the frequency of restarts if they are happening in quick succession, capped at a maximum of five minutes between restart attempts.

The number of restarts can be inspected in the  “restartcount" in the output of kubectl describe, and also in the yaml file in the status section.

If you want to inspect the fields you can configure under “livenessProbe you can run:

$ k explain deployment.spec.template.spec.containers.livenessProbe

If you are using an HTTP-based probe, you have a number of additional variables that can be defined while making the HTTP request:

  • host: Defaults to the Pod IP address.
  • scheme: HTTP or https. Kubernetes 1.8 defaults to HTTP
  • path: Path of the URI request.
  • HttpHeaders: Any custom headers to be included in the request.
  • port: Port on which to make the HTTP request.

So a httpGet liveness probe might loook like

livenessProbe:
        httpGet:
          path: /checkalive
          port: 8888
          httpHeaders:
          - name: X-Custom-Header
            value: ItsAlive
        initialDelaySeconds: 30
        timeoutSeconds: 10

Readiness probe

Readiness probes are generally necessary if your container depends on other things that might be unavailable at the beginning (like a database service not started yet).

When a readiness probe fails for a container, the container’s pod will be removed from any service endpoint it is registered with.

Here is a sample readiness probe with the “exec” command:

readinessProbe:
  exec:
    command:
        - /usr/local/bin/checkdb
        - --full-check
        - --data-service=my-data-service
  initialDelaySeconds: 60
  timeoutSeconds: 5

PUTTING THE PROBES IN THE MANIFEST

It is fine to have both a readiness probe and a liveness probe on the same container as they serve different purposes.

You can add them under spec.containers: 

apiVersion: apps/v1beta1
kind: Deployment
metadata:
  name: flask
  labels:
  run: flask
spec:
  template:
    metadata:
      labels:
        app: flask
    spec:
      containers:
      - name: flask
        image: quay.io/kubernetes-for-developers/flask:0.3.0
        imagePullPolicy: Always
        ports:
        - containerPort: 5000
        envFrom:
        - configMapRef:
          name: flask-config
        volumeMounts:
        - name: config
          mountPath: /etc/flask-config
          readOnly: true
        livenessProbe:
          httpGet:
            path: /alive
            port: 5000
          initialDelaySeconds: 1
          periodSeconds: 5
        readinessProbe:
          httpGet:
            path: /ready
            port: 5000
          initialDelaySeconds: 5
          periodSeconds: 5
        volumes:
        - name: config
          configMap:
            name: flask-config

Kuberneting – Set, Rollout, apply… update!

The imperative approach allows you to update things faster.

In particular, the following commands:

  • apply
  • scale
  • edit
  • set
  • rollout

APPLY

If you edi the yaml configuration file, you can update your resources by running:

$ kubectl apply -f yourfile.ymal

SCALE

To change the amount of replicas:

$ kubectl scale --replicas 3 deployment webapp

Kubernetes will rearrange the pods immediately. You will see pods being terminated and recreated right away,by running such command.


EDIT

$ kubectl edit deployment/nginx-deployment

SET

The set command is used for frequent little updates.

For example a new imapge version for the pods:

$ kubectl set image deployment <deployment-name> <container-name>=nginx:1.12 --record

If you omit “–record” the change-cause description will not be filled

To set resources:

$ kubectl set resources deployment nginx --limits=cpu=200m,memory=512Mi --requests=cpu=100m,memory=256Mi

This will apply to all the containers.

Set environmental variables in serval ways:
$ kubectl set env deployment nginx --env VAR1=value1
$ kubectl set env deployment nginx --from=configmap/vars --keys="var1,var2"
$ kubectl set env deployment nginx --from=secret/passwords --keys="pass1

Afterwards, check the pods have the environmental variables:
$ kubectl exec -it <podname> bash -- -c "env | grep <varname>"

This will happen to your live resource. After running this command, the image will be updated

ROLLOUT

The kubectl rollout command applies to a deployment. For example, to check the status:

check status:
$ kubectl rollout status deployment/test-deploy

To get the history of the deployment:

$ kubectl rollout history deployment flask

deployments "flask"
REVISION  CHANGE-CAUSE
1         initial deployment
2         kubectl set init container log-sidecar
3         deploying image 0.1.1
4         deploying image 0.2.0

If you annotate your deployment you will see the infomarion in the CHANGE-CAUSE column.

To rollback the deployment to the previous version:

$ kubectl rollout undo deployment/flask

To roll it back to a specific revision:

$ kubectl rollout undo deployment/flask --to-revision=2

Sometimes you don´t want to wait for the deployment to be recreated and you want to trigger it yourself. you can do it like:

$ kubectl rollout restart deploy my-deploy

Kubernetes – Getting ready for CKAD Certification

Although you can refer to the official Kubernetes during the exam, you need to be very fast at completing the tasks.

So it´s important to use aliases and shortcuts, take advantage of the documentation in the CLI (like “kubectl explain” or “–help”) and understand how to update resources.

CREATE ALIASES AND SHORTCUTS

The “k” alias for “kubectl” is provided. But to spare time, once you are logged in the exam shell, you might additionally need to define other things, like the context switching:

$ alias kn='kubectl config set-context --current --namespace 

$ export now=”--force --grace-period 0”

$ export do=“--dry-run=client -o yaml”

This way, creating a yaml for a pod file becomes a lot easier:

$ k run pod1 --image=httpd:2.4.31-alpine --labels="test=true,tenancy=test" --env tempdir=/tmp $do > pod.yaml

This allows you to edit the file before creating the objects with “k create -f” or “k apply -f“:

$ k create -f pod1.yaml

USE THE CLI DOCS RATHER THAN WEB PAGES

For example
$ kubectl explain pods.spec.tolerations

UPDATE DEPLOYMENTS QUICKLY

After creating a deployment with replicas:

$ kubectl create deploy httpd-frontend --image=httpd:2.4-alpine

you can update the number of replica live :

$ k scale --replicas 6 deployment httpd-frontend

And also, for example, add resources limits:

$ k set resources deploy httpd-frontend --limits=cpu=200m,memory=512Mi --requests=cpu=100m,memory=256Mi

You can add new labels, like:

$ k label deploy httpd-frontend tenancy=prod

Or ovewrite an existing one:

$ k label deploy httpd-frontend app=frontend --overwrite

ADD environment variables:

$ kubectl set env deployment/registry STORAGE_DIR=/local

Or even directly from a config map or a secret
$ kubectl set env deployment nginx --from=configmap/vars --keys="var1,var2"
$ kubectl set env deployment nginx --from=secret/passwords --keys="pass1

Let´s try for example:

$ k set env deploy httpd-frontend --env var3=344343

Once you have set the environment variable, the pods are terminated and recreated.

So you need to pick a new one to check if the environmente varialbe is there:

if you update the image:

$ kubectl set image deploy httpd-frontend httpd=httpd:2.6-alpine

Afterwards you can add an annotation to the current deployment, to see the information in the rollout history:

$ kubectl annotate deploy httpd-frontend kubernetes.io/change-cause='update image'

EXPOSING A DEPLOYMENT OR POD (SERVICE CREATION)

Services can also be created with commands, like:

$ kubectl expose deploy redis -n marketing --type=NodePort --port=6379 --name=msg-svc

$ kubectl expose pod redis --port=6379 --target-port=6379 --name=redis-service

this will make Kubernetes create a service for you deployment.

You can also use “create service”:

$ kubectl create service clusterip my-cs --clusterip="None"

PASSING A COMMAND TO A NEW JOB

$ k create job njob –-image=busybox:1.31.0 $do > job.yaml –- sh -c “sleep 2 && echo done”

POD CPU USAGE

You will be asked to check which pods is consuming the most CPU. You can check it out with “top”:

$ k top <podname>

CREATE A VOLUME CONFIGURATION IN A POD

Although deprecated, if you only need a pod with volumes, using the “-o yaml” option will add one for you, that you can later edit.

k run nginx2 --image=nginx -o yaml > lab5.yaml

Of course there´s a lot of lines to clean up, but if you are fast with vim you can make it.

this will run a pod, but you can delete it and keep the file for creating what you need.

RUN NEW PODS WITH CONFIGURATION ELEMENTS

You add other stuff in your configuratio in the CLI directly, like:

  • labels
  • environment variables
  • command for your pod
  • service account

k run mypod --image=busybox --labels="tier=msg,review=none" --env VAR1=hello --env VAR2=world –serviceaccount=mysa -o yaml > p.yaml --command -- sh -c "while true; do date; sleep 2; done"

Then you just need to delete the pod “mypod”, edit the yaml file (deleting the “managedFields” sections) and create the pod you need.

This is much better than copying and pasting codes, as you don´t have indentation issues. And you can quickly find the command options at:

https://kubernetes.io/docs/reference/generated/kubectl/kubectl-commands

On the right side of the docs you always have examples:

CREATE VS RUN

You can use “kubectl run” to create pods.

$ kubectl run alpaca-prod --image=gcr.io/kuar-demo/kuard-amd64:blue --labels="ver=1,app=alpaca,env=prod"

But if you want to create a deployment you can´t use run. You will need to use “kubectl create”:

$ kubectl create deploy httpd-frontend --image=httpd:2.4-alpine

MAKE SURE THINGS WORK!

Check things are running with “kubectl get”, or describe:

$ K describe po messaging | grep -C 5 -I labels

Pipe commands with grep to avoid scrolling too much. you won´t have time!

Access pods to run commands in the bash:
$ kubectl exec -it sidecar-pod -c sidecar– /bin/sh

And curl service endpoints!

JOBS & CRONJOBS

To create a job imperatively, pass the command at the end:

$ K create job neb-new-job –-image=busybox:1.31.0 $do > /opt/course/3/job.yaml –- sh -c “sleep 2 && echo done”

To create a cronjob, you generally need to pass the schedule parameter

$ kubectl create cronjob dice –-image=kodecloud/throw dice –-schedule=”*/1 * * * *”

You can as well create a job out of a cronjob:

$ kubectl create job test-job --from=cronjob/a-cronjob

TEST YOUR SERVICES

You should be able to curl your service:

A temporary pod with the nginx:alpine immage running curl would be helpful:

$ kubectl run tmp --restart=Never --rm -i --image=nginx:alpine -- curl -m 5 manager-api-svc:4444

If you can´t curl this way, probably the service is malconfigured..and endpoint missing.

Kubernetes – Namespaces

You can create a single physical cluster as a set of virtual clusters by using namespaces.

After creating you first namespace, for example “my-space”, you can see that, as default, you also have a default namespace as well other others used by kubernetes under the hood:

Namespaces in Kubernetes allow you to group workloads and resources together.

It´s very useful if you have a lot of objects and you want to search or execute operations on some of them according to the purpose.

Namespace don´t provide isolation. By default, pods can access other pods and services in ohter namespaces, but you can isolate them by using network policies too. And also apply resource quotas to them.

You can´t assign nodes and persistent volumes to the same namespaces. This means, for example, that pods from different namespaces can you the same persistence storage.

If you omit the namespace (by using “-n myspace” or “–namespace myspace”), kubernetes will use the default one.

Make sure that users that can operate on a dedicated namespace don’t have access to the default namespace. Otherwise, every time they forget to specify a namespace, they’ll operate quietly on the default namespace.

The best way to avoid this situation is to “seal” the namespace and require different users and credentials for each namespace, like using users and root iwith sudo on your machine.

If you are planning to work with the same namespace for a while, you can defne a context, so you don’t have to keep typing --namespace=ns for every command:

$ kubectl config set-context dev-context --namespace=my-space --user=default --cluster=default
Context "dev-context" created.
$ kubectl config use-context dev-context
Switched to context "dev-context".

it´s good to split complex systems into smaller groups. For example, in a multi-tenant environment (prod-dev-test). And namespaces can help you!

Kubernetes – using the patch command for updates

What´s really cool about kubernetes is that you can update your workloads live.

One kubectl command that definetely might make you achieve things faster is the patch command.

Let´s say you want to add a container to the following deployment:

apiVersion: apps/v1
kind: Deployment
metadata:
  name: dep-to-update
spec:
  replicas: 2
  selector:
    matchLabels:
      app: nginx
  template:
    metadata:
      labels:
        app: nginx
    spec:
      containers:
      - name: ngxinx-container
        image: nginx

To add another container you can create a patch file called “redis-patch.yaml”:

spec:
  template:
    spec:
      containers:
      - name: patch-demo-ctr-2
        image: redis

All you need to do then is executing a command like:

$ kubectl patch deployment dep-to-update --patch-file redis-patch.yaml

After running this command, kubernetes will redeploy the updated version.

If you run “k describe pod dep-to-update-3829238kdls” you will see that both containers are created:

If you access the dep-to-update deployment yaml file, you can now see both containers:

Don´t forget to put “spec > template > spec > containers” in the patch file.

The following file won´t be patched:

    spec:
      containers:
      - name: patch-demo-ctr-2
        image: redis

Kubernetes – Pods Security Context

A security context allows to control the privileges and access settings for a pod or container.

It allows you to define:

  • permissions to access an object (Discretionary Access Control)
  • security labels (Security Enhanced Linux)
  • privileged and unprivileged users
  • Linux capabilities
  • privilege escalation allowance
  • etc.

As default the containers run the processes as root. This is possible thanks to the container isolation principle.

However, in some circumstances, you might need to use specific rights according to your needs.

If you want to define a configuration for the whole pod, you can edit the security Context section under pod.spec.

In the container section, you also the opportunity to edit it under spec.containers, as you can see in the docs.

The following example shows you both the settings:


apiVersion: v1
kind: Pod
metadata:
  labels:
    run: nginx-secure
  name: nginx-secure
  namespace: default
spec:
  securityContext:
    runAsNonRoot: true
    runAsUser: 1000
    runAsGroup: 1001
    supplementalGroups:
    - 1002
    - 1003
  containers:
  - image: nginx
    name: nginx-secure
  - name: sec-ctx-demo
    image: busybox
    command: [ "sh", "-c", "sleep 1h" ]
    volumeMounts:
    - name: sec-ctx-vol
      mountPath: /data/demo
    securityContext:
      allowPrivilegeEscalation: false
      readOnlyRootFilesystem: true
      runAsNonRoot: false
  volumes:
  - name: sec-ctx-vol
    # This AWS EBS volume must already exist.
    awsElasticBlockStore:
      volumeID: "3232323"
      fsType: ext4

We use cookies to personalise content and ads, to provide social media features and to analyse our traffic. We also share information about your use of our site with our social media, advertising and analytics partners.
Cookies settings
Accept
Privacy & Cookie policy
Privacy & Cookies policy
Cookie name Active

Privacy Policy

What information do we collect?

We collect information from you when you register on our site or place an order. When ordering or registering on our site, as appropriate, you may be asked to enter your: name, e-mail address or mailing address.

What do we use your information for?

Any of the information we collect from you may be used in one of the following ways: To personalize your experience (your information helps us to better respond to your individual needs) To improve our website (we continually strive to improve our website offerings based on the information and feedback we receive from you) To improve customer service (your information helps us to more effectively respond to your customer service requests and support needs) To process transactions Your information, whether public or private, will not be sold, exchanged, transferred, or given to any other company for any reason whatsoever, without your consent, other than for the express purpose of delivering the purchased product or service requested. To administer a contest, promotion, survey or other site feature To send periodic emails The email address you provide for order processing, will only be used to send you information and updates pertaining to your order.

How do we protect your information?

We implement a variety of security measures to maintain the safety of your personal information when you place an order or enter, submit, or access your personal information. We offer the use of a secure server. All supplied sensitive/credit information is transmitted via Secure Socket Layer (SSL) technology and then encrypted into our Payment gateway providers database only to be accessible by those authorized with special access rights to such systems, and are required to?keep the information confidential. After a transaction, your private information (credit cards, social security numbers, financials, etc.) will not be kept on file for more than 60 days.

Do we use cookies?

Yes (Cookies are small files that a site or its service provider transfers to your computers hard drive through your Web browser (if you allow) that enables the sites or service providers systems to recognize your browser and capture and remember certain information We use cookies to help us remember and process the items in your shopping cart, understand and save your preferences for future visits, keep track of advertisements and compile aggregate data about site traffic and site interaction so that we can offer better site experiences and tools in the future. We may contract with third-party service providers to assist us in better understanding our site visitors. These service providers are not permitted to use the information collected on our behalf except to help us conduct and improve our business. If you prefer, you can choose to have your computer warn you each time a cookie is being sent, or you can choose to turn off all cookies via your browser settings. Like most websites, if you turn your cookies off, some of our services may not function properly. However, you can still place orders by contacting customer service. Google Analytics We use Google Analytics on our sites for anonymous reporting of site usage and for advertising on the site. If you would like to opt-out of Google Analytics monitoring your behaviour on our sites please use this link (https://tools.google.com/dlpage/gaoptout/)

Do we disclose any information to outside parties?

We do not sell, trade, or otherwise transfer to outside parties your personally identifiable information. This does not include trusted third parties who assist us in operating our website, conducting our business, or servicing you, so long as those parties agree to keep this information confidential. We may also release your information when we believe release is appropriate to comply with the law, enforce our site policies, or protect ours or others rights, property, or safety. However, non-personally identifiable visitor information may be provided to other parties for marketing, advertising, or other uses.

Registration

The minimum information we need to register you is your name, email address and a password. We will ask you more questions for different services, including sales promotions. Unless we say otherwise, you have to answer all the registration questions. We may also ask some other, voluntary questions during registration for certain services (for example, professional networks) so we can gain a clearer understanding of who you are. This also allows us to personalise services for you. To assist us in our marketing, in addition to the data that you provide to us if you register, we may also obtain data from trusted third parties to help us understand what you might be interested in. This ‘profiling’ information is produced from a variety of sources, including publicly available data (such as the electoral roll) or from sources such as surveys and polls where you have given your permission for your data to be shared. You can choose not to have such data shared with the Guardian from these sources by logging into your account and changing the settings in the privacy section. After you have registered, and with your permission, we may send you emails we think may interest you. Newsletters may be personalised based on what you have been reading on theguardian.com. At any time you can decide not to receive these emails and will be able to ‘unsubscribe’. Logging in using social networking credentials If you log-in to our sites using a Facebook log-in, you are granting permission to Facebook to share your user details with us. This will include your name, email address, date of birth and location which will then be used to form a Guardian identity. You can also use your picture from Facebook as part of your profile. This will also allow us and Facebook to share your, networks, user ID and any other information you choose to share according to your Facebook account settings. If you remove the Guardian app from your Facebook settings, we will no longer have access to this information. If you log-in to our sites using a Google log-in, you grant permission to Google to share your user details with us. This will include your name, email address, date of birth, sex and location which we will then use to form a Guardian identity. You may use your picture from Google as part of your profile. This also allows us to share your networks, user ID and any other information you choose to share according to your Google account settings. If you remove the Guardian from your Google settings, we will no longer have access to this information. If you log-in to our sites using a twitter log-in, we receive your avatar (the small picture that appears next to your tweets) and twitter username.

Children’s Online Privacy Protection Act Compliance

We are in compliance with the requirements of COPPA (Childrens Online Privacy Protection Act), we do not collect any information from anyone under 13 years of age. Our website, products and services are all directed to people who are at least 13 years old or older.

Updating your personal information

We offer a ‘My details’ page (also known as Dashboard), where you can update your personal information at any time, and change your marketing preferences. You can get to this page from most pages on the site – simply click on the ‘My details’ link at the top of the screen when you are signed in.

Online Privacy Policy Only

This online privacy policy applies only to information collected through our website and not to information collected offline.

Your Consent

By using our site, you consent to our privacy policy.

Changes to our Privacy Policy

If we decide to change our privacy policy, we will post those changes on this page.
Save settings
Cookies settings